|
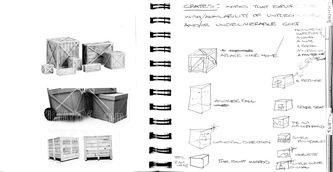
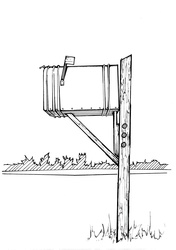
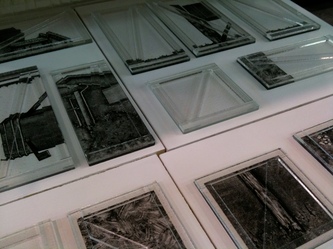
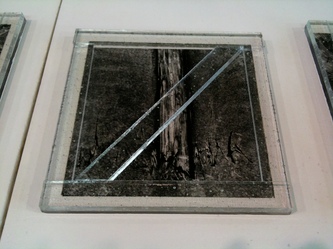
I thought I would detail some of the background story for one of my new series the Crate Series.... Idea: The Crate Series is my first new series since moving to Australia from America. My previous series were primarily focused on exploring the structures and forms found in the everyday surroundings of urban landscapes. By highlighting on these sometimes overlooked places and objects, I was trying to highlight the common elements, struggles and conditions of life experienced by individuals regardless of the exact city in which they were living. Upon moving to Australia, I lost my landscape. I felt that my imagery did not extend it's meaning to my new environment. This has led me to a new chapter and this new series. With the Crate Series I am transitioning my imagery and ideas to span the distance between my old horizons and my new. The Crates are pieces that physically represent the form of a shipping crate and the imagery on the interior depicts an object or idea that would be a need or a want for something that is un-orderable, un-receivable and/or undeliverable. These "crates" are empty and enclosed forms that hold nothing but the depiction of the unobtainable. Construction: To create the works for this Crate Series , I first think of an appropriate piece to construct. See Fig.1a I then draw the image that I would like to illustrate on the interior of the glass form. I do take photos to help my editing of composition and detail, but my sketches are rendered freehand. This allows me to edit the image the way I see them in my head and have the image retain the evidence of being done by my hand. See Fig.1 for a sample of a final sketch. Once I have my drawing, I scan the black and white image into my computer so that I can print it onto transparencies. I then take the transparencies and make sandblast resists that will allow me to blast the line work of the image onto the glass blanks. Each of the six sides of the crates are made from clear pre-fused glass blanks. After fusing, the edges of the blanks are cleaned up to make the edges sharp and clean. Once this is done, I then apply the prepared sand blast resists to the surfaces and blast the line work gently into the glass surfaces. The blasted lines then get a high fired enamel paint wiped into them (similar to a etching plate for printmaking). I then paint and wipe more ink onto the image to give it gray-scale, tone and definition. The paint is then fired onto the surface of the glass in another firing. Once the image is fired onto the glass blanks, I then flip the pieces over and place them back into the kiln with additional cut glass strips on top. These glass strips are then tack fused to the surface of each piece in a third firing. These strips give the blanks the dimensional support slating that mimics that of wood crates. See Fig.2 for a kiln load of pieces prior to this tack fuse and Fig.3 for a detail shot of a single panel that has been tack fused. After this third firing, the pieces are gently sandblasted on their surface. Each piece is then put back in the kiln for a fourth and final firing to gently fire polish the sandblasting to a gentle burnished look. This surface for me gives the final form a more physical appearance and also hazes the image as if it was a memory. The six sides are then glued together into their final form. The sides of the crates are glued with an acrylic set UV glue, and the caps are adhered with a construction grade silicone. These two glues enable the form to more easily adjust to fluctuations in room temperatures and to endure handling. One of the sides also gets a small hole drilled through it to enable the form to "breathe" and handle changes in altitude. The pieces are then signed, photographed and recorded. If you are interested in these works, please contact the Duane Reed Gallery.
0 Comments
Your comment will be posted after it is approved.
Leave a Reply. |
Please click HERE to let me know if there are any topics you would like me to post information about.
Categories
All
|


